 Skip to content

See More
How to install solar panels?
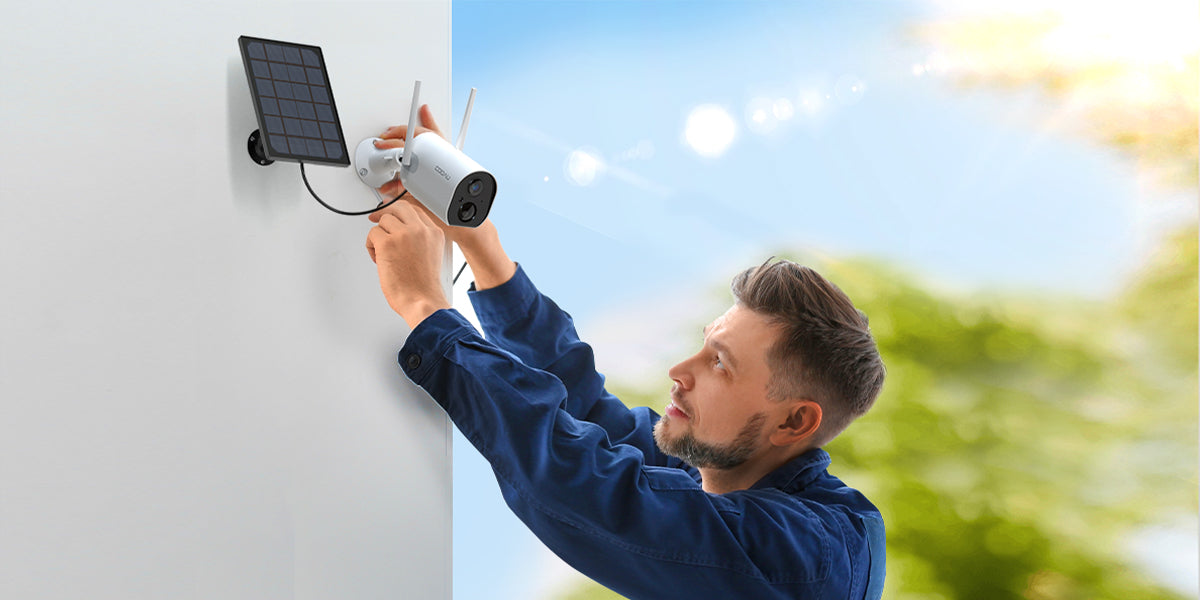
In addition to the instructions for connecting the mount to the panel, the wooden skylight, or the exterior wall of the house described in the user manual of the solar panel, the following six tips can help you better install the camera.
1. Locate a spot where you can mount the panel.
So that, when the sun is at its highest point in the sky that the panel will be fully covered with the sun. And it's best to angle it so rain can easily runoff as well as snow or ice. Also, be aware of areas that are subject to high wind.
2. Use a long enough cable
Be sure the cable will be long enough to make it to your camera without it having to make a tight pull. A tight pull on the connector will cause stress on the cable.
3. Mount the bracket
Make sure the 90-degree point of the swivel points in the correct position. Tighten all 3 screws tight enough to be firm, but not so tight to either strip or break them.
If you must mount the panel on your roof, you will likely need longer screws so that you go through the shingle to the wood. It is also advisable if mounting to the roof, to use a sealant to be sure you don't cause a leak. This is especially important if mounting to a metal roof.
4. Tighten the stud
Once the mount is in place and tight, (and sealed if need be) screw the panel onto the stud on the bracket. Be sure the stud screws in as far as possible but don't over tighten. It is advisable to use a pair of pliers to tighten the lock collar but, not extremely tight.
5. Install solar panels
Now with the main sollar, aim the panel as in step 1 and tighten it tight enough that the panel won't change position during high wind. You will likely need to use pliers to do this. Again, don't tight it so hard to snap or strip it.
Note:
Leave a small loop of cable by the panel and secure the cable as needed to the side of the house, or the path back to the camera. It shouldn't dangle or be too folded up right next to the camera. The extra weight could cause the connector to eventually come loose.
If it's necessary to roll up excess cable, secure it to the panel the camera is mounted to. When securing the cable, take care not to pinch it! The idea is to not allow the cable to just hang off the panel or the camera for the wind to not move it excessively.
If you must route the cable around a gutter or some other sharp point, it might be wise to apply a few wraps of electrical tape where the cable will contact that point.
6. Connect with the camera
Finally, remove only the part of the rubber plug to allow the cable connector through it and plug it into the camera. Since this is a Micro USB connection, be sure the plug is aligned in the right way to slide into the actual connection.
Note that you won't see it charging via the app since it charges at a constant, but lower rate than a charger. Due to the fact it's charging for probably up to 10 to 12 hours a day, it should keep your camera's internal battery fully charged unless you are getting constant triggers or using the live view for an excessive amount of time a day.
The above are six tips to help you better install the solar panel. If you have any questions, please feel free to contact us at official@cooau.com
Leave a comment